How I Updated My Kitchen, Dining Room, and Breakfast Nook Curtains and Place Settings for Under $5010/22/2015 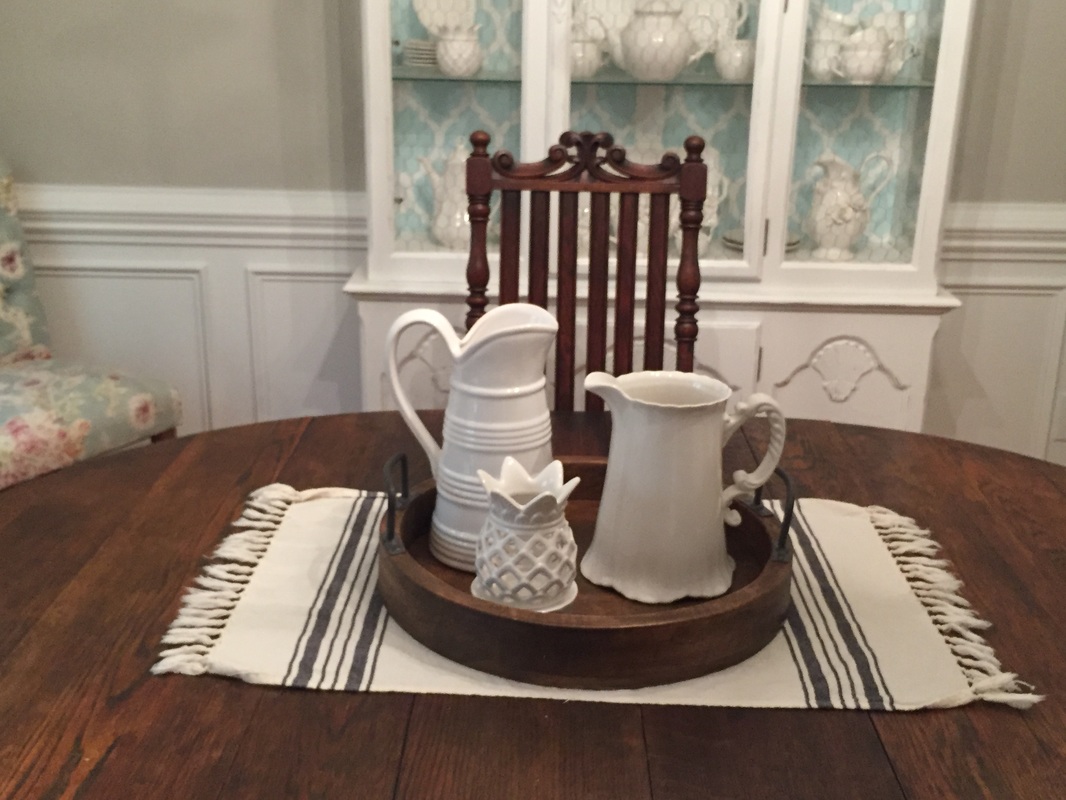

0 Comments
Before & After
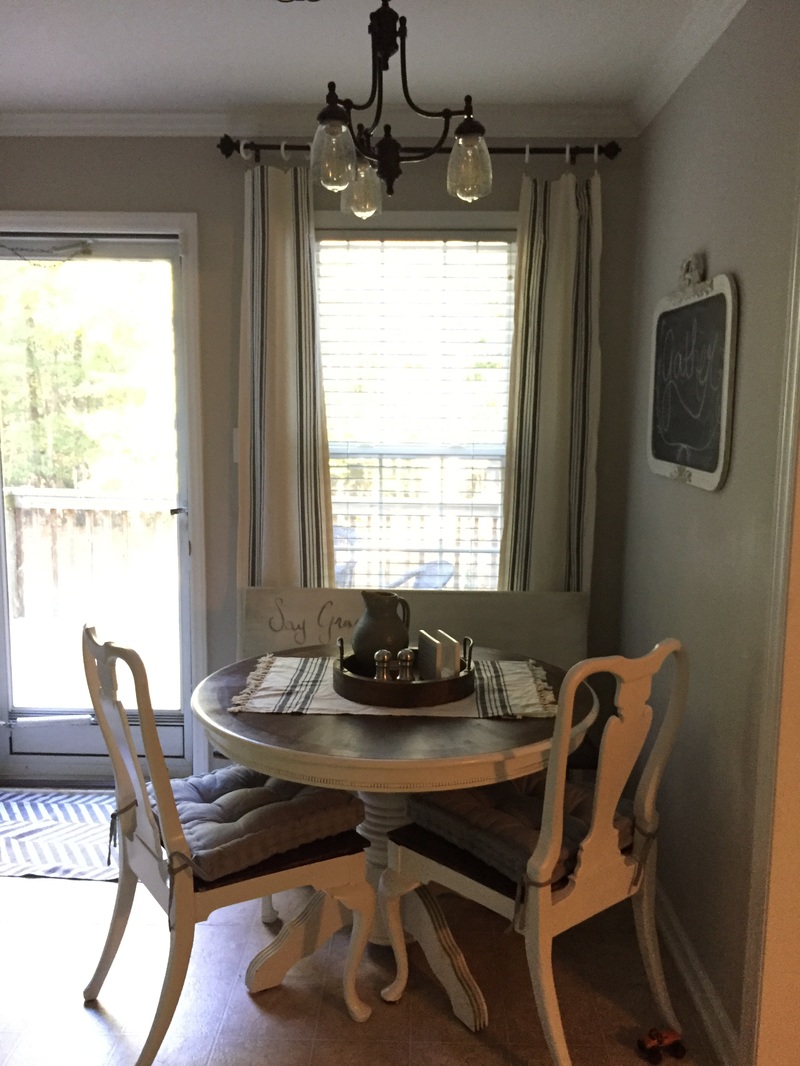
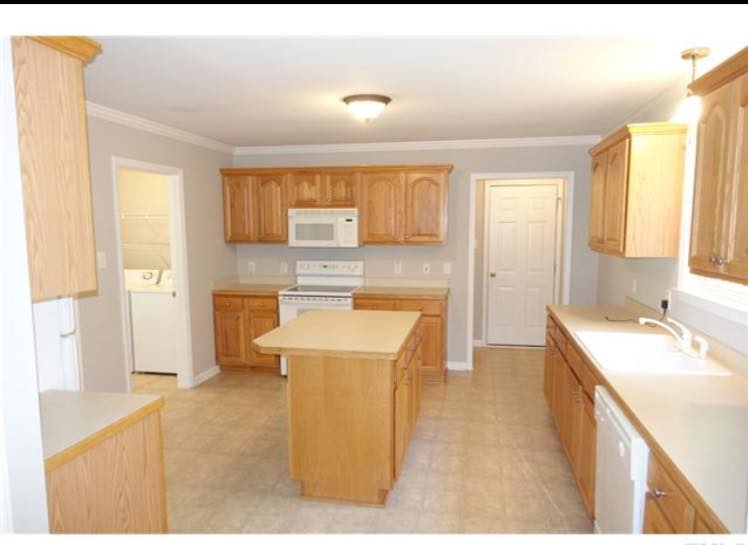
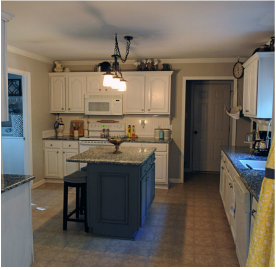
Aaaaaah, white kitchens! Is there anything that can stop our Pinterest browsing faster than a picture of a white kitchen? A white kitchen with some farmhouse accents and decor~Sign me up! It's my personal match made in heaven! My husband and I found this house, and when I saw that kitchen.....yep....that before pic one right up there, I begged and pleaded with our awesome Realtor to MAKE THIS HAPPEN! We had that pesky problem (aka reality) to deal with where we had to sell our house before we could buy this one, but we knew, God willing, this was the one! I'm happy to say, we've just crossed the one year mark of being in this home, and are having an absolute blast making all the rooms match the "after picture" I had in mind during that first walk through! My husband is a very visual person, but "visual" meaning in the here and now! He can only see exactly what he's looking at! If I describe how something is going to look he has zero, nada, zilch concept of what I am actually talking about until it is finished and he can lay his pretty baby blues on it! Our kitchen still needs updated appliances & new floors, SO TRY to picture these pictures with black or stainless appliances, and those drool worthy 6 inch wide, and extra long, hickory or walnut looking hardwood (laminate because we have kids and dogs who could care less about scratching real wood, so~yes! I'll pinch those pennies~please & thank you) :) Picture it with wood and not our ripped linoleum?? Deal??? .......Deal! :) Okay, pictures: Lastly, the details & nitty gritty on the changes we made are down below the pictures! Changes we made:
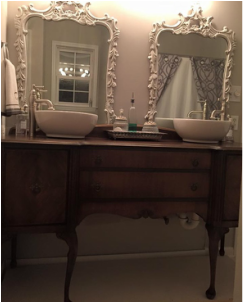
We tried to think of some easy things that we could do that would really add some character to the room. ~For the cabinets we: painted them, glazed them, created contrast with the island and counter top colors. *We used (and loved) the Rustoleum Cabinet Transformation Kit. It's holding up wonderfully, easy to clean, and the only area we're having any chipping struggles is the top of the cabinet that holds our sliding trash can. That is completely our fault. For some reason, no one ever remembers there's actually a KNOB on that door! :) (I too am guilty.....I don't know what it is with that one cabinet)! If you're in the NC area (specifically close to the Raleigh and surrounding areas), and do not want to take this task on yourself, I HIGHLY recommend _Lexie and the Chi Ashley, and her husband do a SUPERB job, and their quality of work is immeasurable! ~We added shelf brackets to the ends of the upper cabinets, and a rectangular molding to the sides of the island. These steps really helped the cabinets have a custom feel to them, and were not expensive at all! ~We bought finial feet to put on the bottom the cabinet ends, but can not put those in until the floors are done. Again, this will add a very custom feel as well. We bought fatter ones to frame the bottom of the island, and thinner ones to frame the end sections of the base cabinets. ~We changed our light fixtures and faucets, which really helps with the farmhouse goal. I can't stress this step enough! If you can't afford new ones, paint your existing ones to mimic the style you most like! ~Lastly, and probably most importantly, we added rustic, vintage decor items that have a very raw, organic feel to them. I LOVE LOVE LOVE the hanging scale from Dot & Bo, and the linen board that holds our mother's & grandmother's handwritten recipes. Aside from the obvious stores (flea markets, antique stores, several online stores, Home Goods, Kirklands, etc), the BEST place to find these items is in your grandma's attic, garage, or basement! With that route, you have vintage and SENTIMENTAL! :) If you're transitioning your room to one with a more farmhouse feel, comment below with what helped make the biggest impact in your room, and your favorite honey hole place to shop! I'd love to see your before and after pictures! This was the quickest, easiest update we have done to our new house so far. My husband changed our faucet from the "knob faucet" to this new, brushed nickle one. I wanted one like this because it was so difficult for our little girl to adjust the water temperature with the knob. With this updated faucet, she can wash her hands without yelling, "MOMMMMMMMY, the water's hot", which makes her happier, and, hey, it's prettier too! win win! For the cabinets, I used a deglosser, then primed them, then painted two coats of colonial blue, applied a dark gray glaze into the detailed areas, and sealed with a good poly. I hated those counter tops before the paint, but, against the blue, I LOVE them! I think it offers a nice contrast! We're likely to add a frame to the mirror "one day", and still have to change our flooring from the linoleum, but "slow and steady" is the name of our game! I'm really happy with this simple before and after! What have you done to personalize your powder rooms? Master Bath Before and After
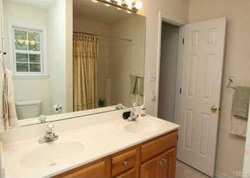
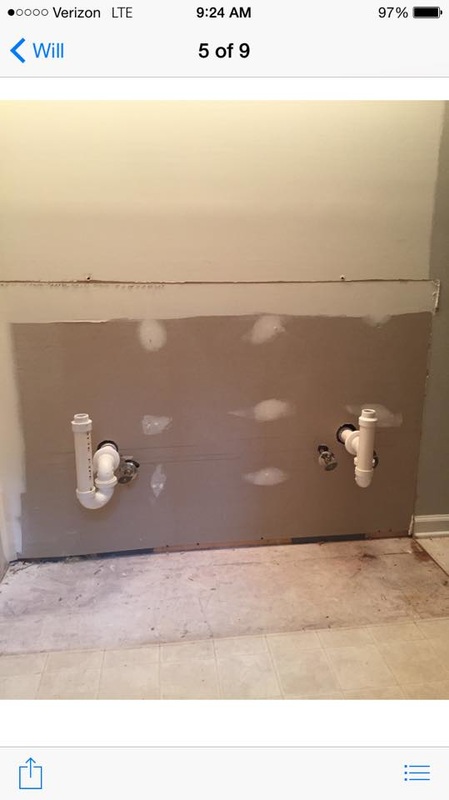
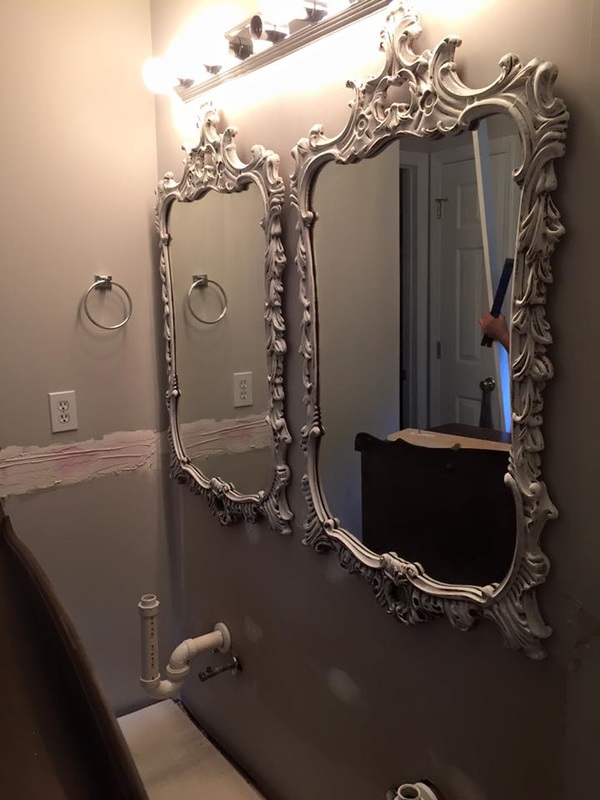
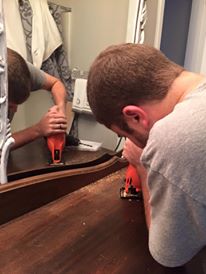
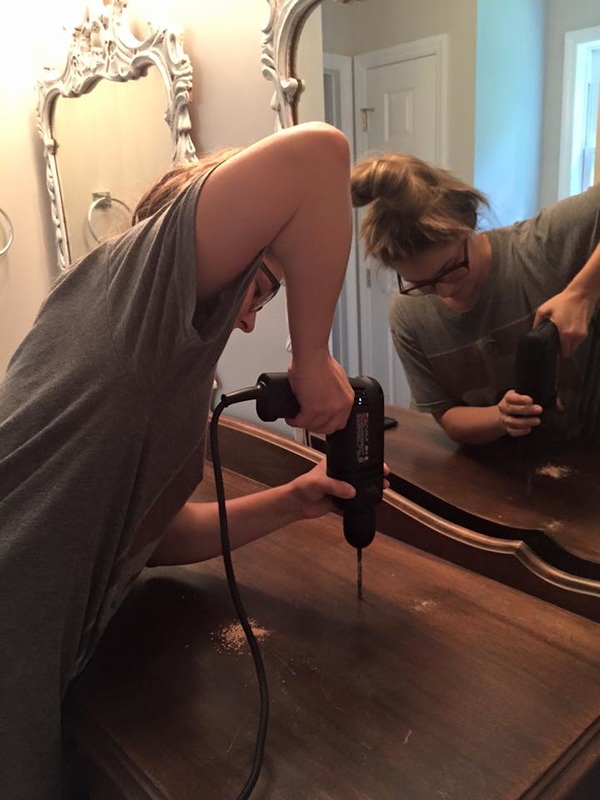
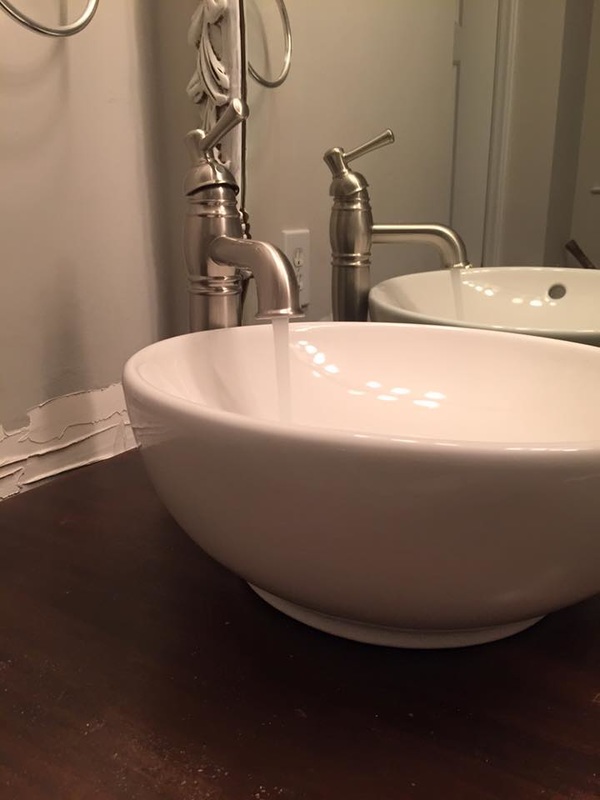
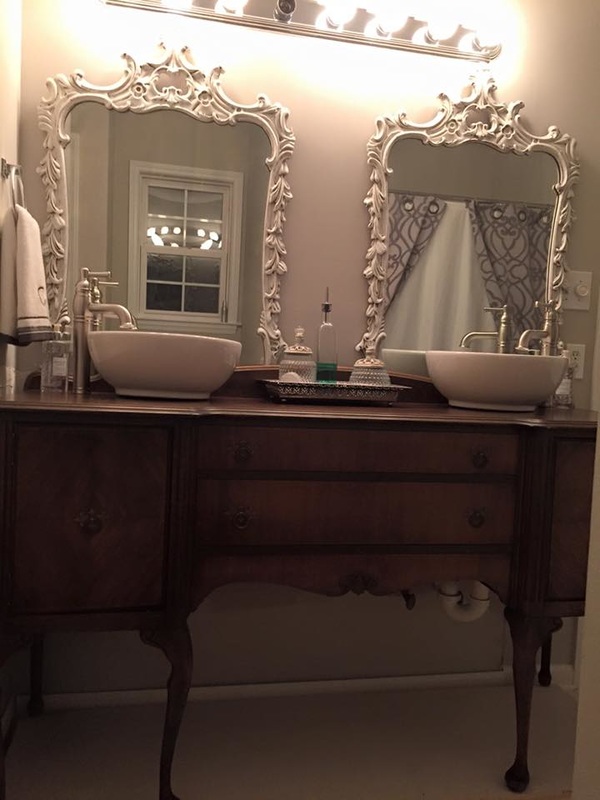
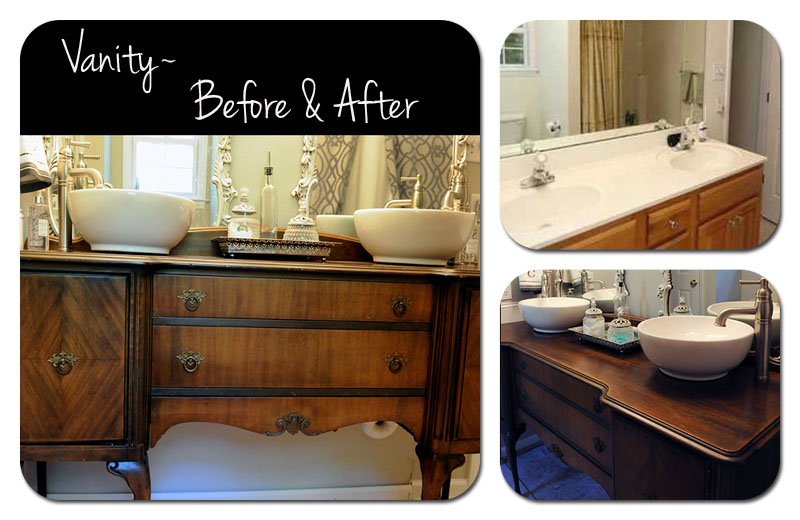
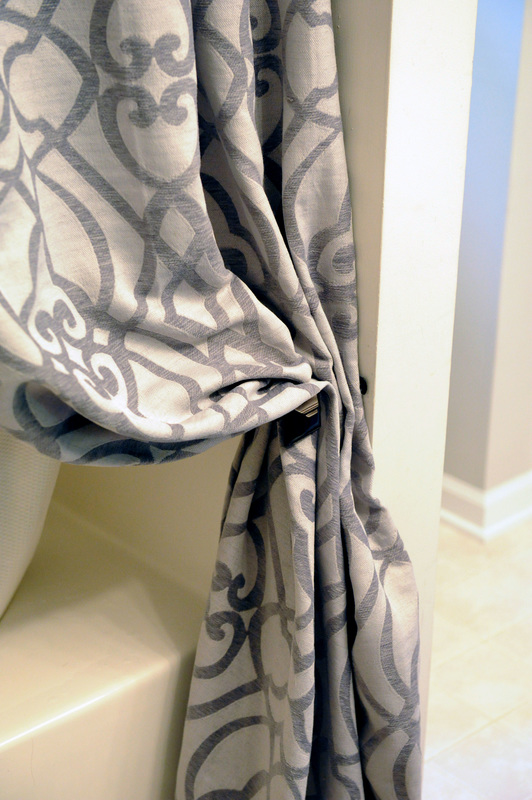
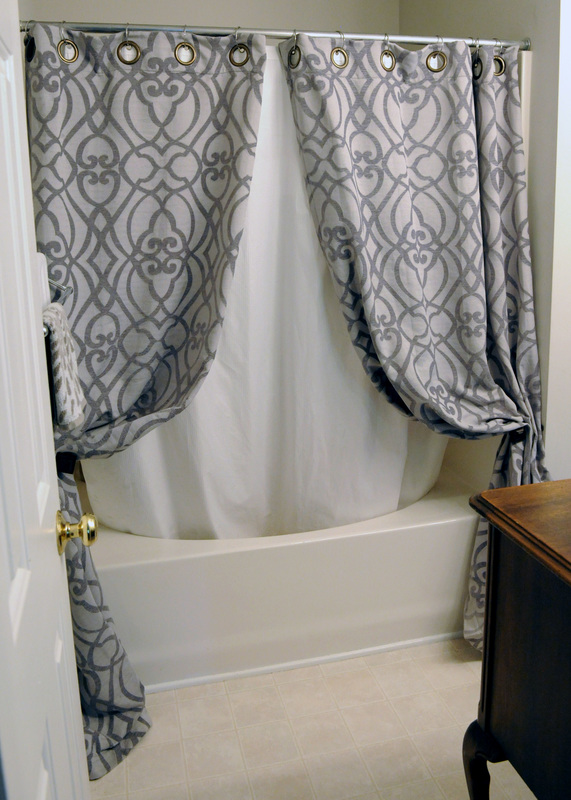
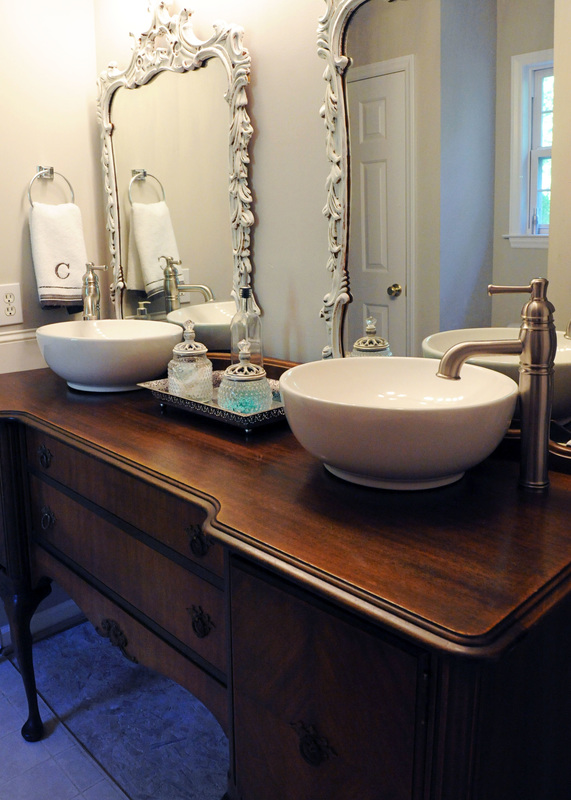
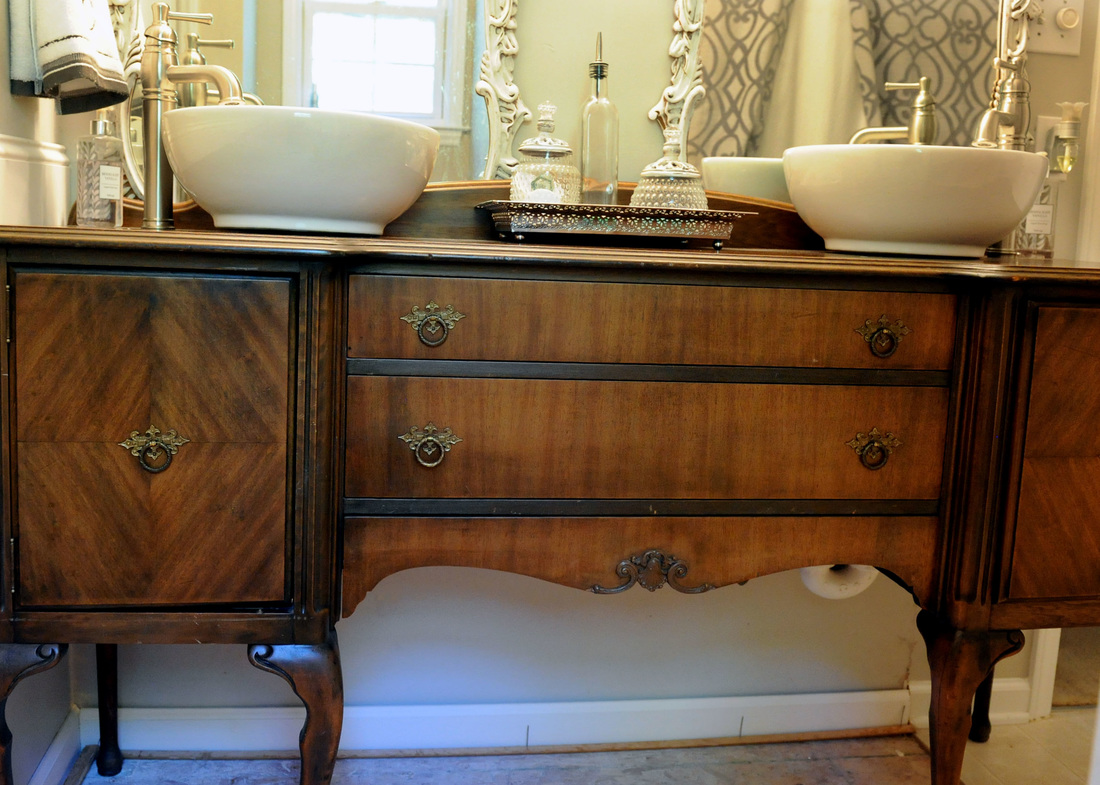
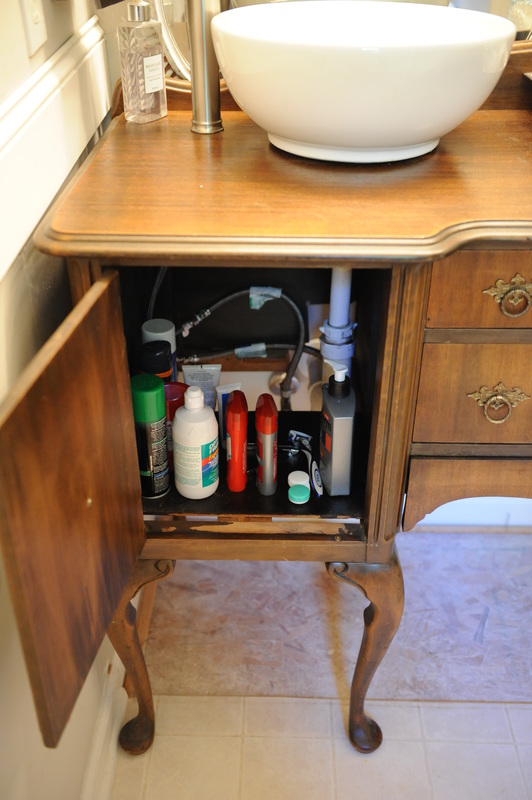
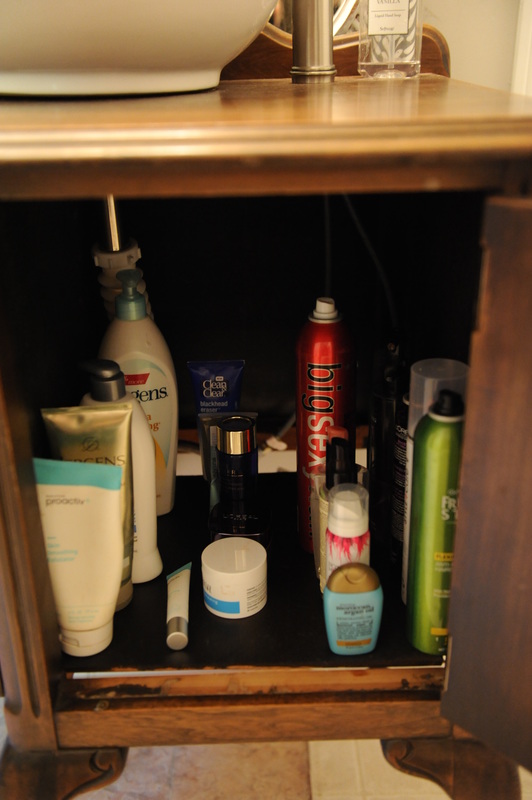
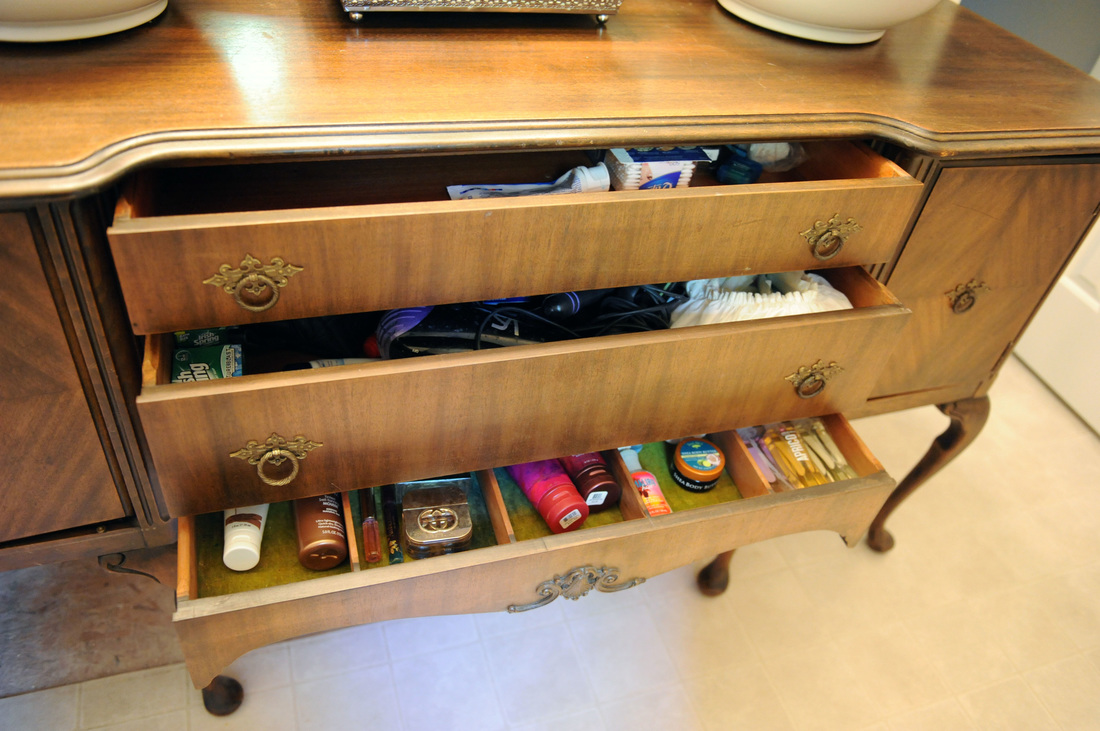
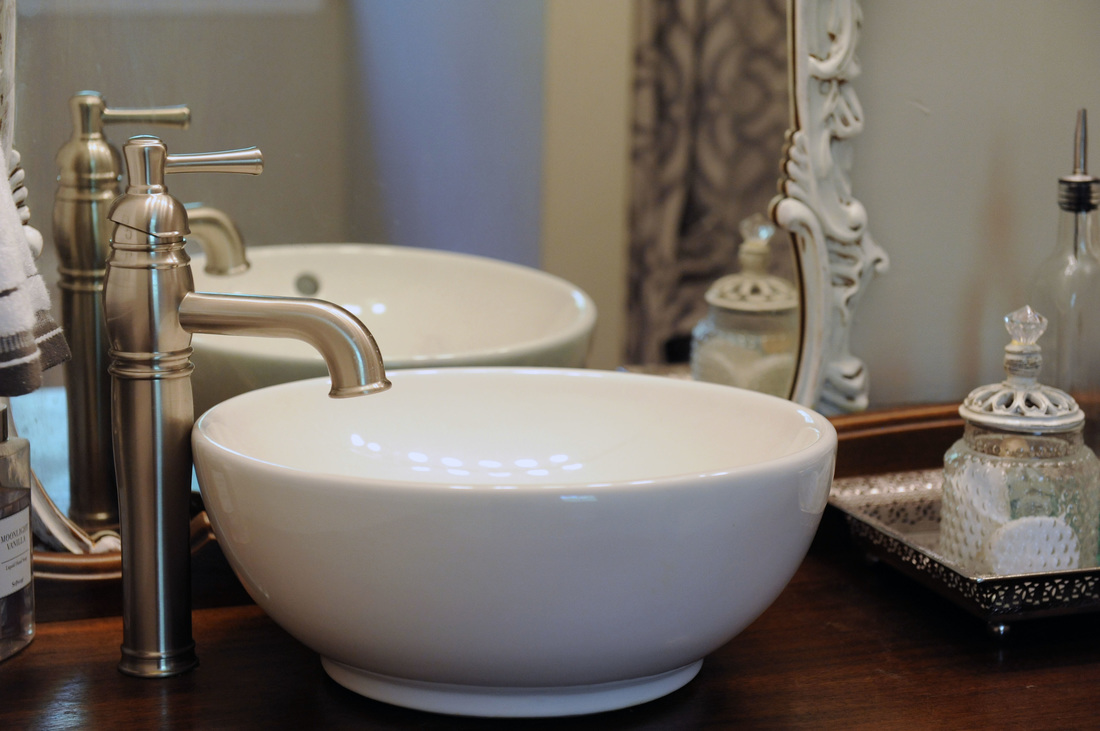
 (Pictures posted at the bottom) Our master bath was a pretty standard master bath. It's a great bathroom, but it just didn't feel....."pinteresty"! It needed something to give it some character. It needed a focal point. Since our budget didn't allow for a total shower overhaul, we overhauled the dual vanity instead. We (meaning I) went into this all gung ho, and full speed! I was doe eyed, and my usual optimist self. I expected this to be smooth sailing, and easy breezy. I will admit to you, it was not! It took several unexpected trips back to the hardware store, and even though it is now "finished" we have visible sub floor now. New flooring is next on our new home renovation list, so I am trying to turn a blind eye toward it. Flooring will be sometime within the year, but, if I come across a cheap carpet runner before then, I'm going to snatch that thing up like it is Walmart's last Black Friday flat screen. :) How we did it: ~First, we removed the mirror, all the caulk, the molding around the base of the existing vanity, and hauled it to the garage (side note: my husband bought a chunk of wood to fit on top, and is now using it as work bench with storage space in the garage)! ~Then we hung the two mirrors that my grandma (mema) and I found at an auction. They were a carmel shade of brown, but I white washed them. ~We carried the "dining room buffet" (also found at auction) into the bathroom, and lined up our measurements for the new pedestal sinks and faucets (we measured, then remeasured, then had the other person come behind and check our measurements because, let's be real, we had never done something like this before)! ~We used a drill to get a starter hole, and then cut our circles for the drain and faucet with a jig saw. ~ tapped the finishing nails out so we could temporarily remove the cabinet bottoms, lifted the piece over the pluming coming out from the wall, and lined the piece up. ~ My husband hooked up all the pluming, which required at least three more trips to the hardware store. This would have been a breeze if we'd been well versed in the world of plumbing! ~We fit the sinks and faucets in place, tightened everything down, and very nervously turned the faucet on! SUCCESS!!! We had running water! ~Next, my husband cut the cabinet bottoms in half to both allow room for the plumbing, and continue to give us storage space. ~I went BACK to the hardware store, got a waterproofing seal, and sealed the top. I wanted to keep that wood, but ensure it would stay nice! I will probably have to reapply it in a few years, but it's worth the little bit of extra effort. Overall Thoughts~ I think this came out wonderfully, but, in ALL HONESTY, I could have just changed the mirror to the two mirrors, painted the existing vanity, and updated the faucets to get a updated feel in there! It would have given the room an overhauled look, but I'm so glad we did we did it the way we did! We learned a lot along the way, and it really does make me smile every time I walk by it. I'll post an updated picture when the flooring is finished as well! |
AuthorI'm a wife, a mother of two, and utterly obsessed with home decorating and renovations (including, but not limited to: painting, decorating, interior design, and furniture renovation). Archives
September 2016
Categories |


 RSS Feed
