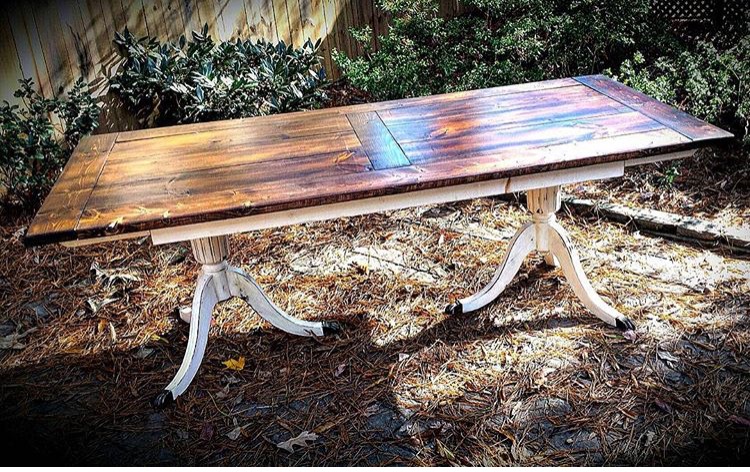
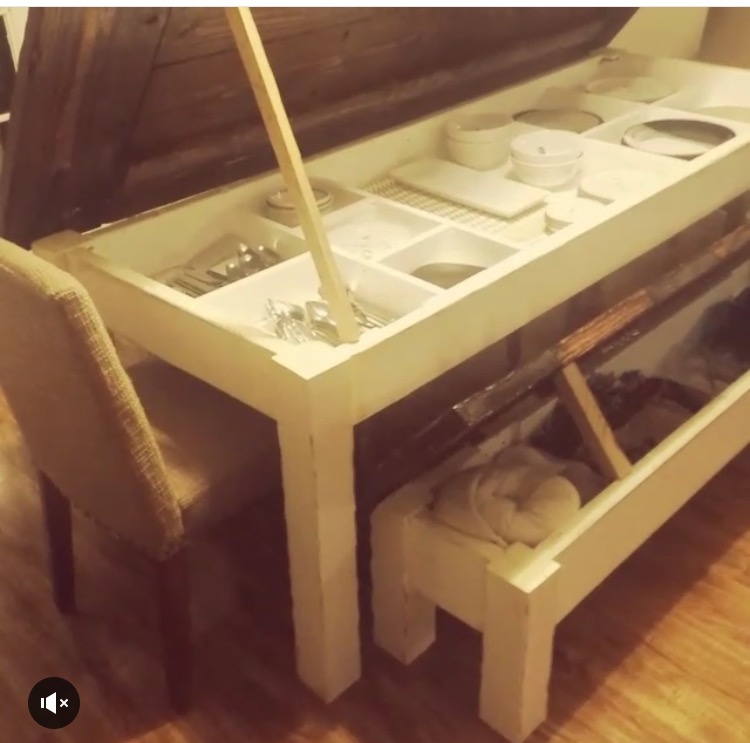
  Did you guys even know this was an option? Storage INSIDE your farmhouse table and bench? Say whaaaaaa? I had not even seen that on Pinterest!
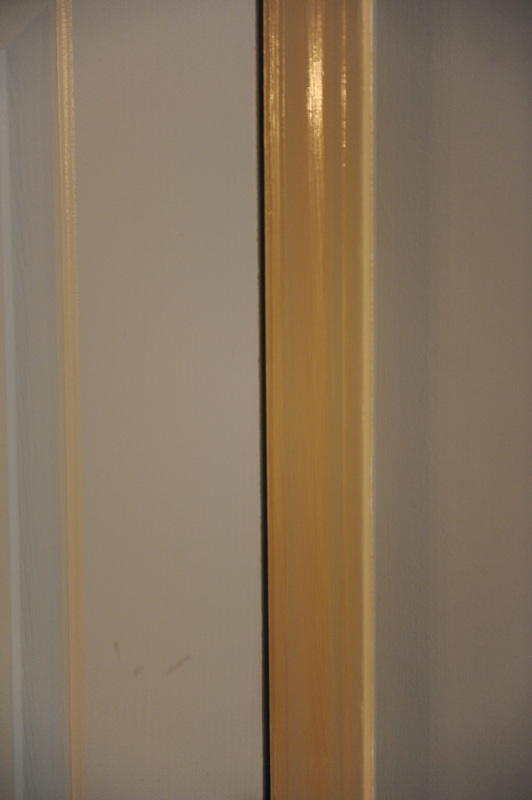
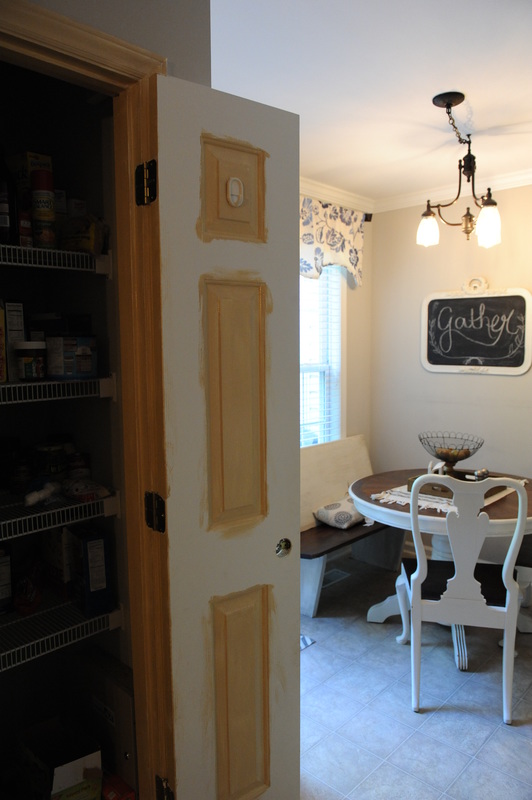
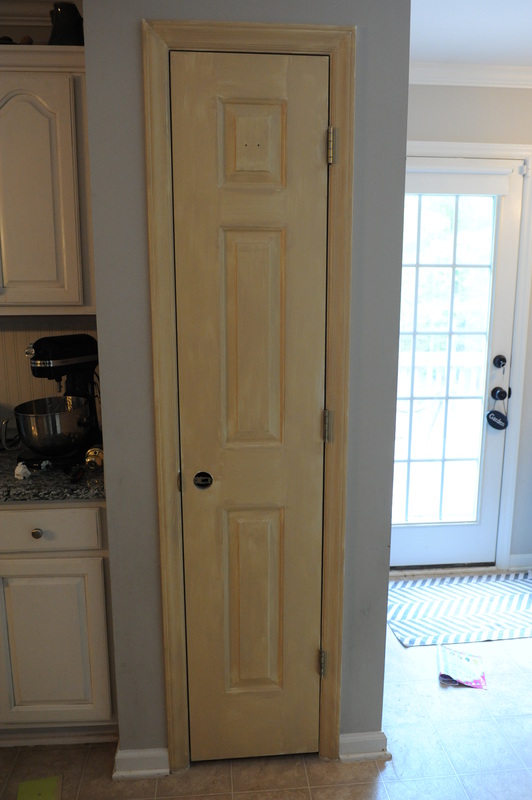
I have been searching and saving for a farmhouse table for quite a while, and was going to buy this beauty here with the duel pedestal legs- drool worthy, #amiright, but someone had already placed dibs on it. That's when I noticed the other tables that had been built WITH the storage feature! I knew I had to tell you guys about it!!! Joe builds these tables to order in Raleigh, NC! You pick your size, stain, style of legs, etc! Joe is working on some benches for us now, as well as some floating shelves! Eventually, our shelves will be complete with a library ladder too, but I have to practice the "slow and steady wins the race" method! Pacing myself with projects has never been a strong suite of mine, but it will be worth the wait! I'll share pictures and an updated post as the pieces are built, but, in the meantime, You can find Joe at Ten_Eight_Custom_Finishings on Instagram! 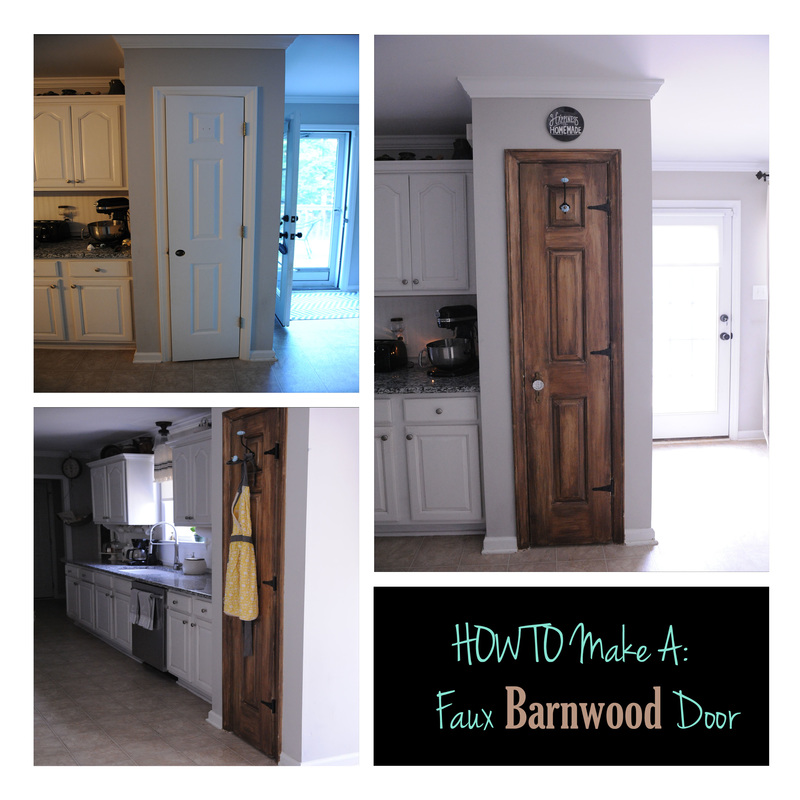 (Raise your hand if you're obsessed with pretty much all things barn wood, rustic, industrial, and farmhouse! Okay, so all of us?! ha :) I have always loved this style, and am quite content with how easy it has become to find decor items lately. I know this style wont always be "the most popular thing", but it is a timeless, classic style! Any of us who knows with every fiber of our being (me, me, me) that this will always been our style, can rack up on decor items while they're so easily available. Do you know what I couldn't rack up on? Barn doors, darn it!!! I don't have a door in my house that will work for a sliding barn door! Not one! Thank goodness God make me creative because at least I can faux that look!!! I thought I'd share how I transitioned our pantry door from a boring white door to a lovely, warm "wood" door!! If you like it, give a shot! I'd love to see your before and after in the comment section below! Okay!!! Here we go! We started with this builder grade, plain white door-(This is after I took the standard, round door knob off) 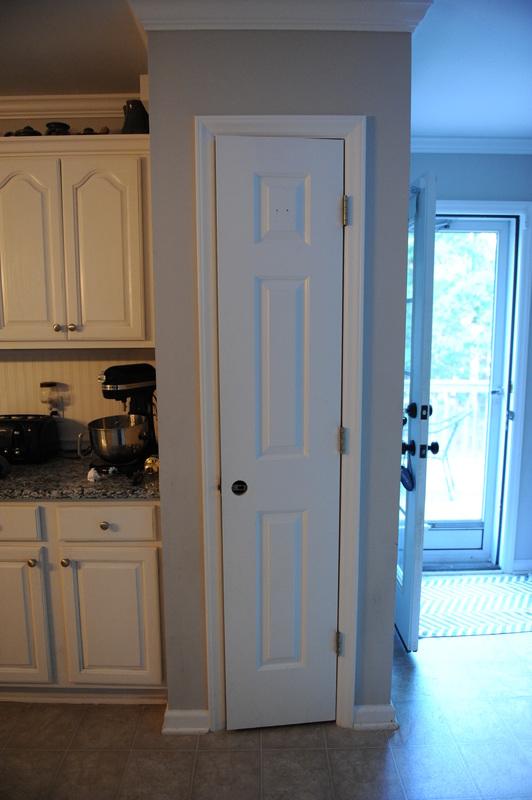 I first mixed up my own chalk paint into a beige color. Because I wanted a very walnut shade door, I went with beige, but depending on the shade you want your "barn door" to be, you'll want to make the chalk paint shade lighter, darker, or more gray. Chalk paint is crucial here though! This is a factory grade door with that slick, almost "plasticy" feel. You need chalk paint because it will not only grip to your door's surface, but also give something for your stain, glaze, and wax to stick to! Step 1- Remove your knob. I did not remove this door from the hinges to do this, but should have changed the hinges BEFORE I started the door! Step 2- Paint the door frame!
Don't forget to paint the frame on the inside as well! 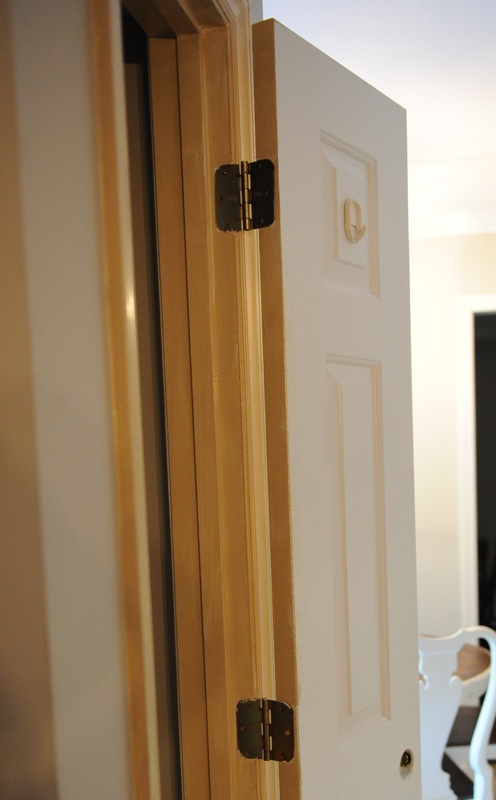 Step 3- Paint any hollow areas of the door first!
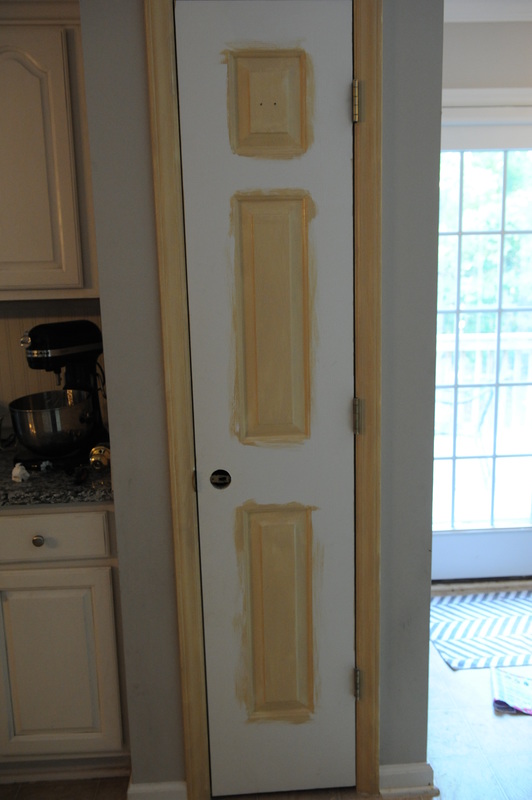
And, Voila!!! Beautiful barn door, right?!!! No? It looks awful? It sure does! I have noticed EVERY project looks awful at the beginning, but don't ever get discouraged by the first several steps! Keep your eye on your vision, and, with each step, you'll notice you're getting closer and closer to matching that picture in your head! Okay! Let's keep going! Step 4- Fill in the rest of your door! (The lighting makes ours look like they're different colors in the pictures below, but they match! I promise! The amber undertones in our edison bulbs are making the inside of the door look darker! Silly color cast science can't you help a sister out for a minute? I went with what the grain would be on a barn door. I went vertically for all the edges and rectangles, and went horizontally for between the rectangles!
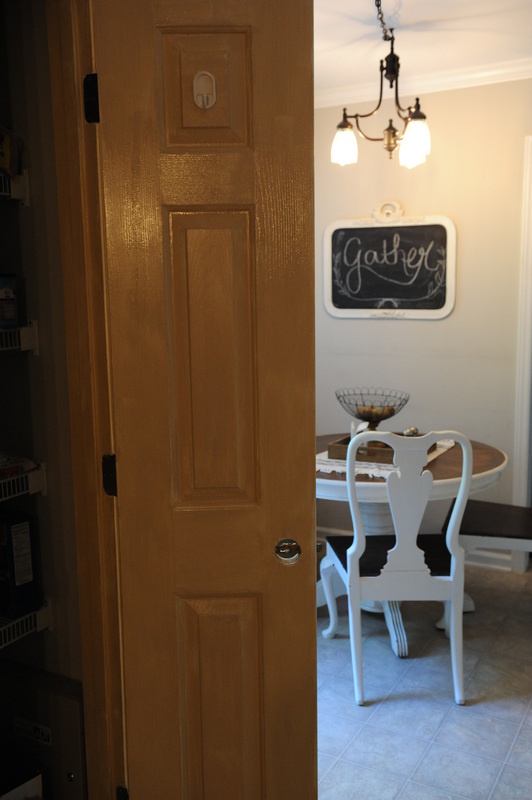
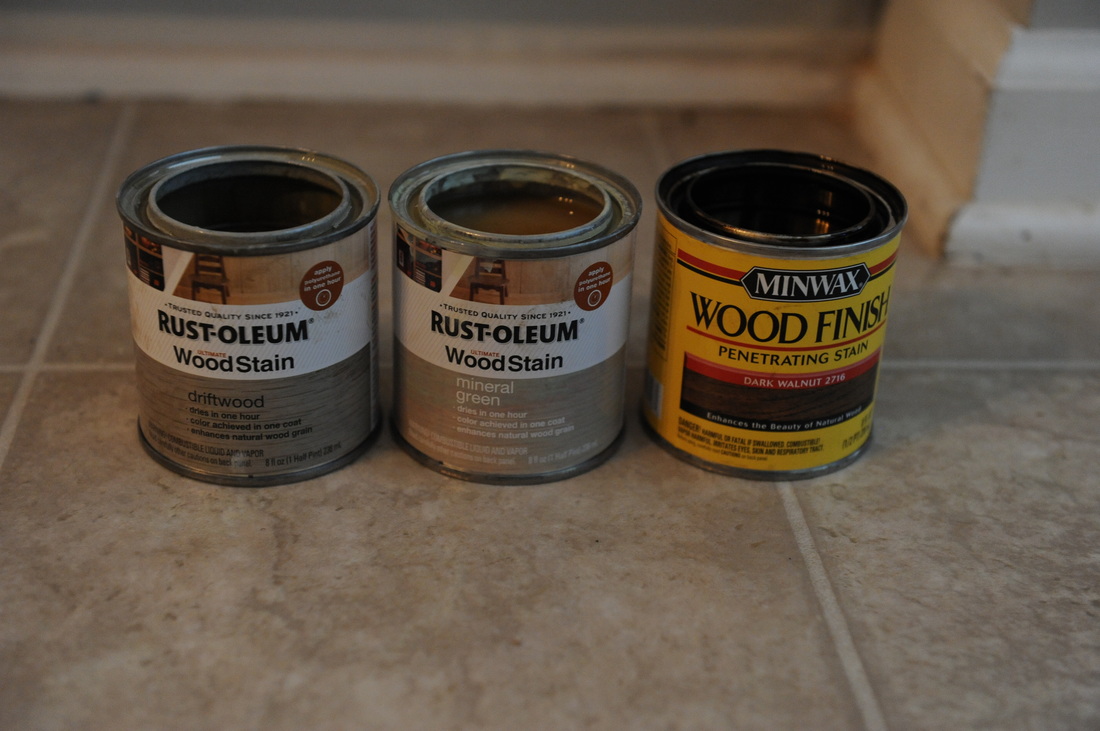 Okay, let this dry! Get your stain shades ready! I knew I wanted to try blending these colors, but ended up only using the dark walnut, and teensy bit of driftwood in the center areas of the three rectangles. Step 5- Using your stain, repeat the steps in the same order you used for the paint: door frame, deep areas, total door. I also went with what the grain would be on a barn door again. I went vertically for all the edges and rectangles, and went horizontally for between the rectangles! I make sure to have heavier coverage in the deep areas and the outer rims of the door. I let the color feather in and soften as I come in toward the rectangles. I also let the color soften as it comes into the center areas of the rectangles. This just helps add dimension and visual interest to your finish and makes it look more realistic. If you look at the pictures you'll notice that the outer rims and deep areas are darker, and the raised area and center areas are softer (lighter)! 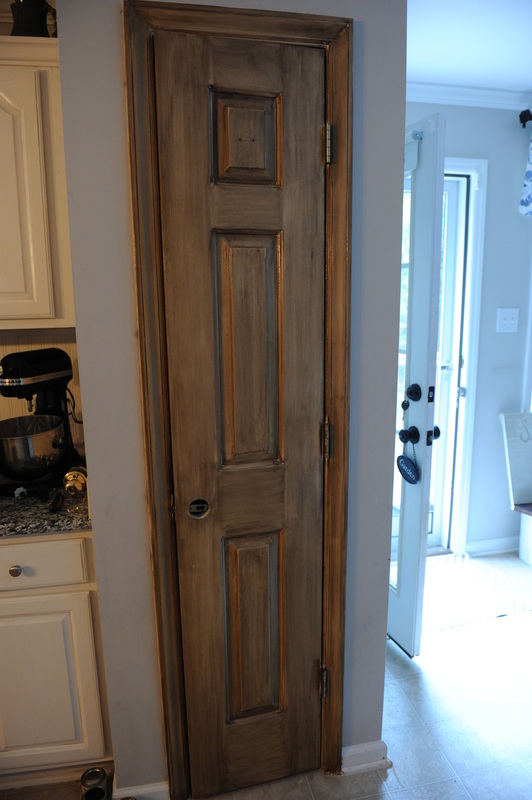 I didn't have painter's tape on hand, but I did have our wall color paint, so I just didn't mind if a tad went onto the wall. I knew I could clean it up, and get a more fresh line than was originally there from the painters before we moved in. Okay, moving on! Step 6- This step is totally optional. I used a Valspar glaze. It's a deeeeeep gray/almost black glaze inside the edges of all those rectangles front and back. I applied it with a sponge brush, and wiped it off with a cheesecloth (your cheesecloth should have a splash of water, a mist of water, just the teensiest bit of water on it. I wash my hands, shake off as much as I can, and dry them with the cheesecloth to get it right)! Just rub it in with the sponge brush, and rub it out with the cheesecloth! This adds shadow to your door, and helps "age it" a lot! Step 7- I used Martha Stewerts Antiquing Wax to seal the entire door. You should wait about 48 hours to use this on top of the stain though. Learn from my mistakes! I didn't wait, and it took about TWO WEEKS to dry!! Anywhoooo, you'll want to seal the door with this antiquing wax in the same manner as with the paint and stain: door frame, depths of door face, and then the whole door. You'll also want to keep heavier coatings on the edges of the door and deep areas to give it a natural look. Just feather in in the same way as the stain. I also went with what the grain would be on a barn door. I went vertically for all the edges and rectangles, and went horizontally for between the rectangles! This step seals your piece AND gives you that final touch for an aged barn wood door look! We changed the hinges and door knob as well, and bingo bango........ya got yourself a barn "wood" door!!! I really love the warmth it has brought to the kitchen!! If you love it to, go for it!!! I know you can do it! If you just don't have the time, bring it to me! I got you! :) 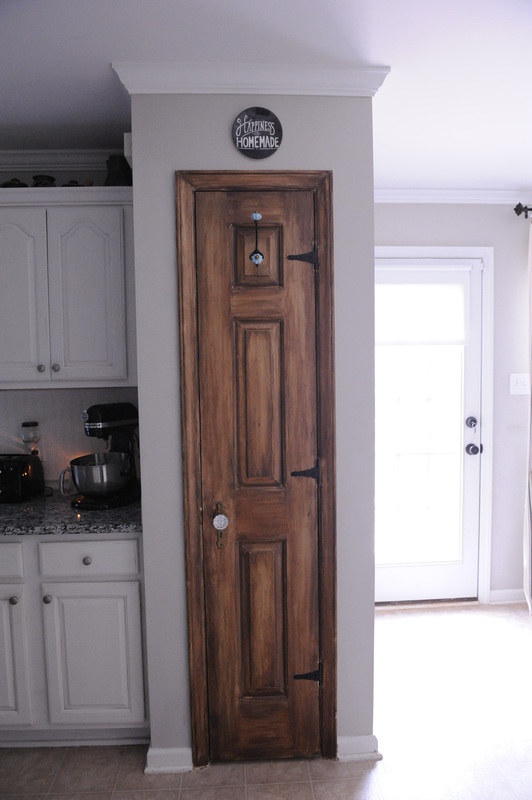 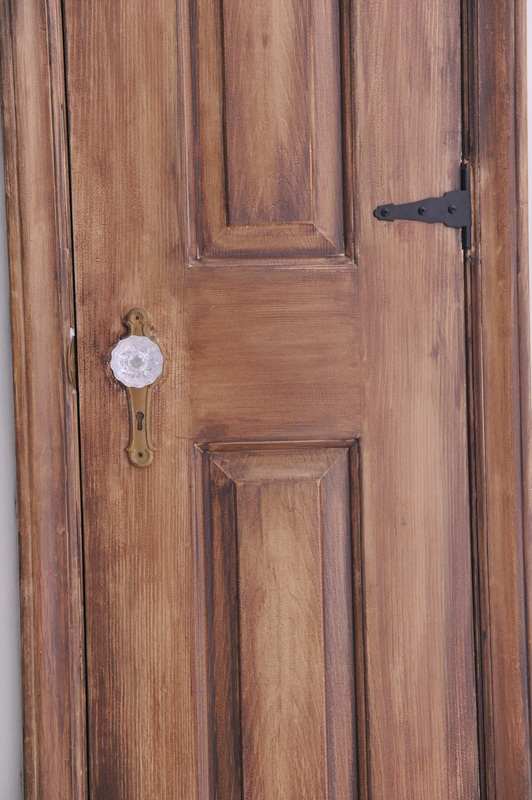 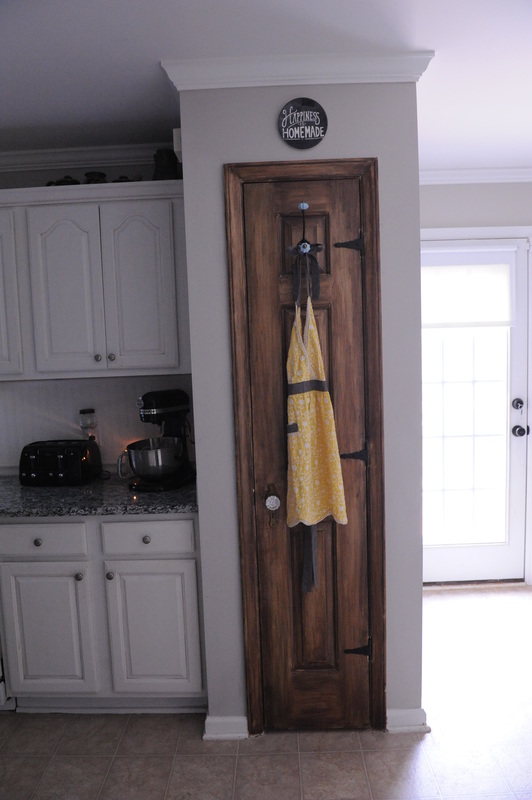   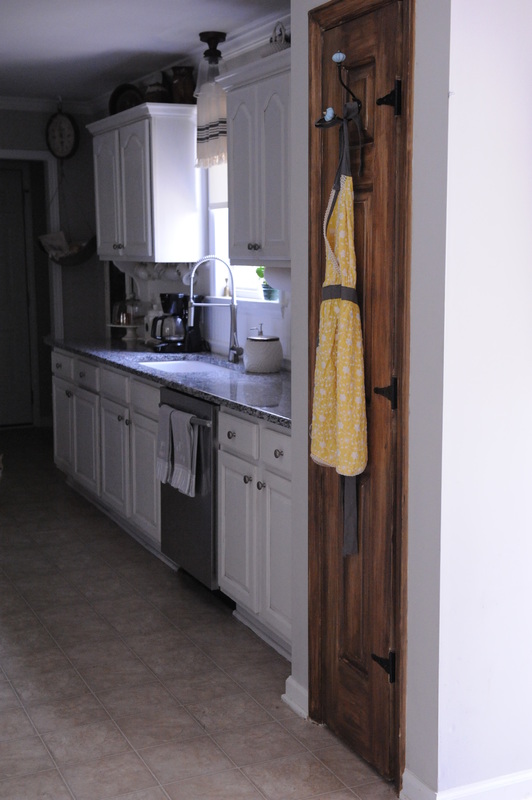 |
AuthorI'm a wife, a mother of two, and utterly obsessed with home decorating and renovations (including, but not limited to: painting, decorating, interior design, and furniture renovation). Archives
September 2016
Categories |


 RSS Feed
