|
Brick backsplash adds so much warmth and texture to your space. One of the greatest things is that since it's backSPLASH, it's only adding a splash of that gorgeous element, and does not visually overwhelm your space! Unfortulantely, real brick can easily overwhelm your budget!!! Well, it can overwhelm our budget anyway! In a 97 year old home with a reno list as long as the weekly grocery list, you get creative in how to cut cost corners and dust off the DIY skills! To be completely honest, we would have passed on having any backsplash at all, and would have just enjoyed another foot or so of this dreamy shiplap, but the backsplash area of the shiplap had been badly damaged. The previous owners had used a laminate tile glued to the wall and had put the glass stick on tiles stuck over that. Removing it all was fairly simple, but that glue had really done a number to the wood. We had originally planned on living with the damaged shiplap while we worked our way through other projects. After we got through more pressing matters, we could come back to the kitchen to install a subway tile. It wasn't until last week, when I white washed/german smeared the adjacent fireplash in our dining room, that I decided to go all in on brick backsplash. I just fell head over hills and needed to see it all over the place! :) I remembered seeing panels of brick sheets at the hardware store, and since our outdoor chore got an unexpected rain delay (these leaves are just bound and determined to stay in our yard) we impulsively decided to tackle backsplash! We measured the backsplash area, drove to the store, loaded up the panel (our measurements indicated that we only needed one), and came home to get started!!!! You can see how the sheets looked before I painted them in two of the pictures from the gallery above. I normally have large photos that reference what I am talking about right below what I am talking about, but I am having some serious techical glitches with inerting images today! I hope to get it straightened out and come in to correct that very soon! We originally thought we could use snips to cut through the panel, but these jokers are for real!!! They're not thin, flimsy sheets of paneling. They were just too thick to comfortably snip our way along. I mean, it's doable, but there would be some serious hand cramps along the way, and quite a bit of time added to project completion. The "brick" has loads of textures and varries from brick to brick. Those differences are really what convices the eye of the brick's authenticity. You feel lots of texture on the "brick" as well. The main diference in feel is the temperature. Authentic brick is cold to the touch, but this is room temperature. We decided to use a very dainty looking saw blade on the jig saw. Because it was raining (and freezing) outside, and this was a project we were doing (per usual) with the kiddos about, we worked inside. Ya'll, this creates an enormous amount of dust. I mean, one panel of the cuts we made filled the dust pan probably 12 times. Maybe even more! Some dust does go up into the air, but the vast majority falls right to the floor. Doing these cuts inside are kind of like using the snips instead of a saw.... It can be done, but not advisable! ha! The center section of these panels are some sort of wood....cardboard? mdf? I don't even know, but it is finely pressed, and the quality is FAB! After you have measured section to section to make your cuts, remember to start your next cut where needed to allow for the grout lines to match up when they're on the wall. You can see what I'm talking about with the picture below. (some imgaes randomly worked and most said they uploaded but never became viewable. I'm so sorry for the inconvenience! Side note: Can you can see all that great texture in the "brick" ??!!! See how it varies from brick to brick! I love that they weren't carbon copies of one another! Totally saved me time when it came to paint them! 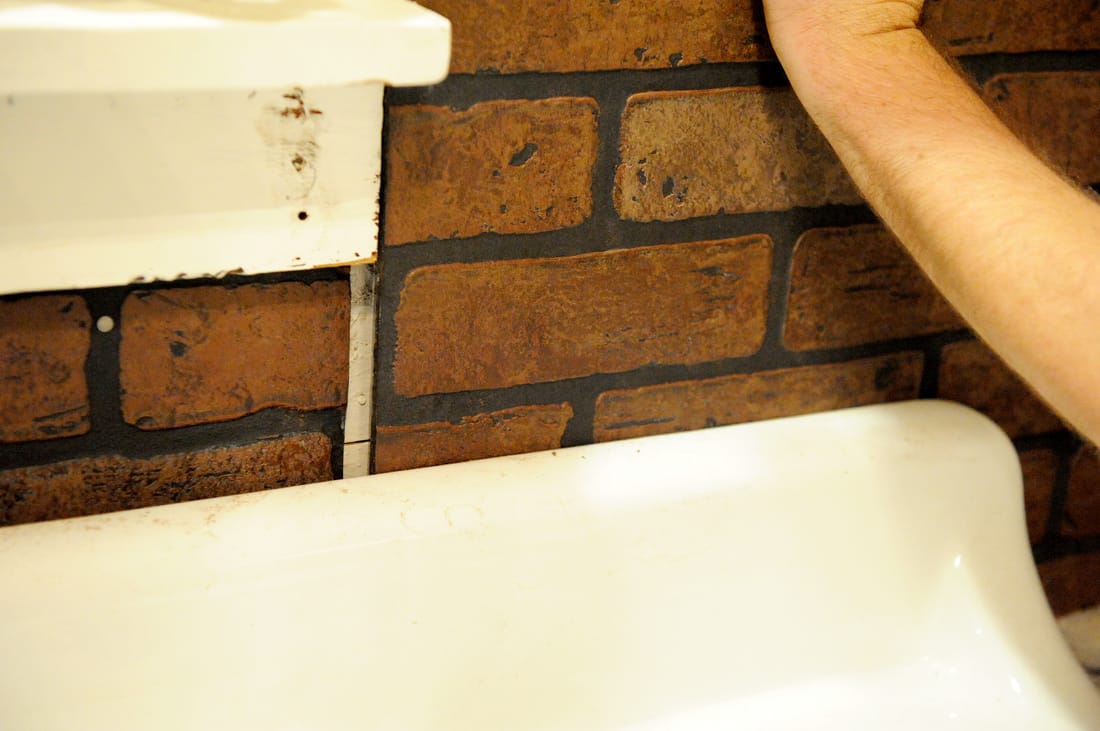 We would hold our sections up to make sure they were going to work, the lay them back down so we could find our measurements for the outlets and light switches. We just measured this with the tape measurer each time, then took those measurements to the brick section, marked it, and cut out the small rectangle. To start the cut, we would use the drill first, which would make a hole just big enough for the saw blade to fit through. The we could easily navigate the saw through and around to cut out the rectangle. Just be sure to make your rectangle smaller than your plate cover so the brick will hide nicely behind the cover. I will say, you will probably need the outlet box extenders. (I believe the technical term is an outlet spacer. They fit around the outlet bolts on the top and bottom, and are really common when adding any backsplash). We didn't need to use them because they were already in place (due to shiplap). I can't offer any suggestions on how to install them, but please be carful to avoid a shock! Okie dokie!!! Install time!!! We thought about using liquid nails, but realized two things: 1- We already had a ton of glue damage to the wall. We knew that we would have a very difficult challenge getting anything stick to that! 2-If we ever changed our minds and wanted something different, a strong adhesive would make removal so complicated. We opted for finishing nails!! The worked like a charm. We just made sure to place them in "grout" lines since they'd have the most heavily applied paint fauxing! Once we worked our way down the one wall, and sighed about having another wall to do, we gave each other a pep talk, thanked the good Lord above for how well the first wall came out, and jumped back in there for wall number two! The second wall had much less cuts to be made, and went by so much faster! (The second wall is also the only wall currently cooperating with whatever is going on with this image loading glitch!! Instillation took only three and half hours! Not too shabby, right! So, if you're keeping a tally, so far we're out three and half hours and $25.00! The next step was to paint the brick!! I made my own chalkie paint for this, but you can use any chalk paint. I know a lot of people use the actual concrete mix that is used on real brick. It looks amazing, but has to be sealed, is very chalky, and seemed to me like it would make cleaning a chore....not a good combination for a food prepping and cooking area. It could be totally fine, and, if you know a nice way to seal it, I'd totally say to go for it, but I really wanted to use paint! It's what I am comfortable with, and I didn't want to make any rookie mistakes that could ruin all our hard work! I started with the "grout" lines. I applied this heavily and unevenly. Being thicker in some areas, a little smother in some areas, and messily applied helped create a real grout look! (This is seriously so easy) Not being perfect IS what makes this end up looking perfect in the end!!! Isn't that so nice?! Like, when does that ever happen anywhere else?! lol! After the grout lines were finished, I would barely, barely touch the tips of the bristles into the can of paint. With a lighthand, I would brush from the outer edges of the bricks to the middle. Doing it this was would create a feathering effect with heaviest application towards the outer edges and almost nothing toward the center. This went fast. Just back and forth in sections. Any areas that were too heavy or looked like streaky brush marks would wipe and blend right away with a damp washcloth. I made this layer very thin, and then did it again. The first layer gets it up there, lets you step back to breathe it all in, and lets you decide where you want heavier sections. Going back the second time, I would more heavily fill in some areas. Just randomly choosing bricks that felt like they should be heavier. I made thicker areas on certain grout lines and had it sort of spill off the edge down some bricks. I thought about going back a third time to make it even heavier, but decided I would sleep on it and then decide! I'm glad I did because I decided stopping there would be a good idea after all! This took 30 minutes total!!!! So, 3 1/2 hours to install, 30 minutes to paint, and $25! I mean, you can't beat that! They do have a beadboard option that your could use instead of brick, AND I think you could paint the entire brick, seal with a high gloss seal, and have faux subway tile pretty easily toooooo!!!! If you give this a shot, please share pictures with me! I would love to see how yours turns out! Thanks for stopping by, best of luck on your project, and happy DIYing! 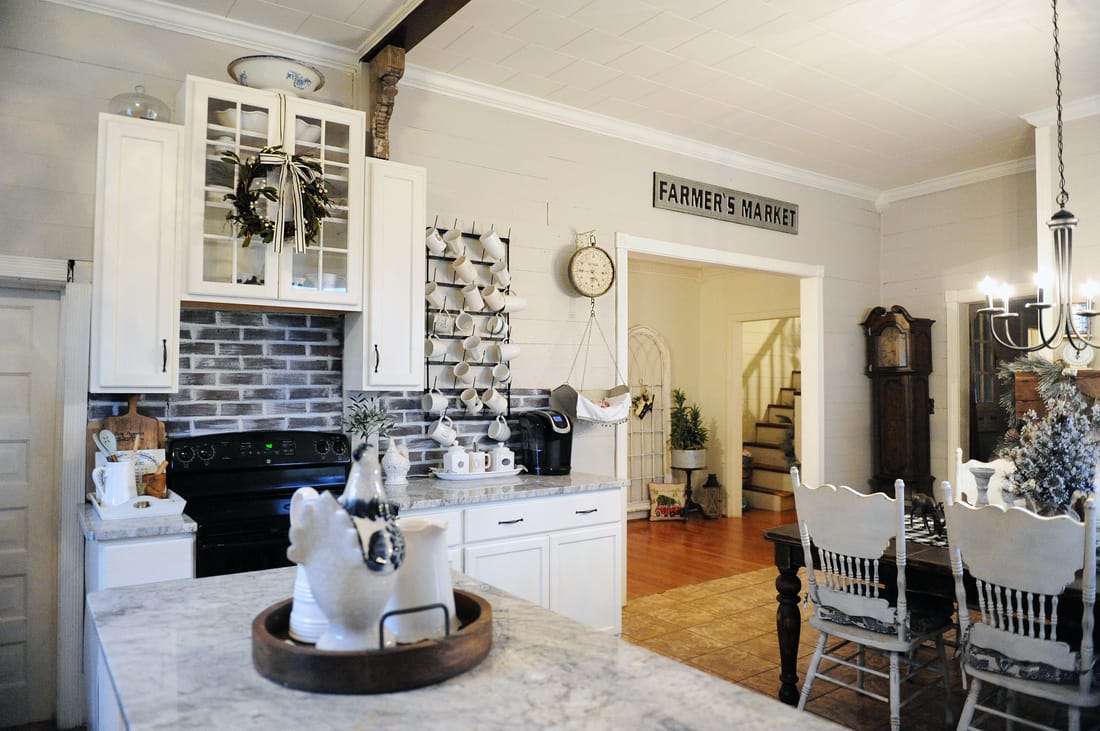 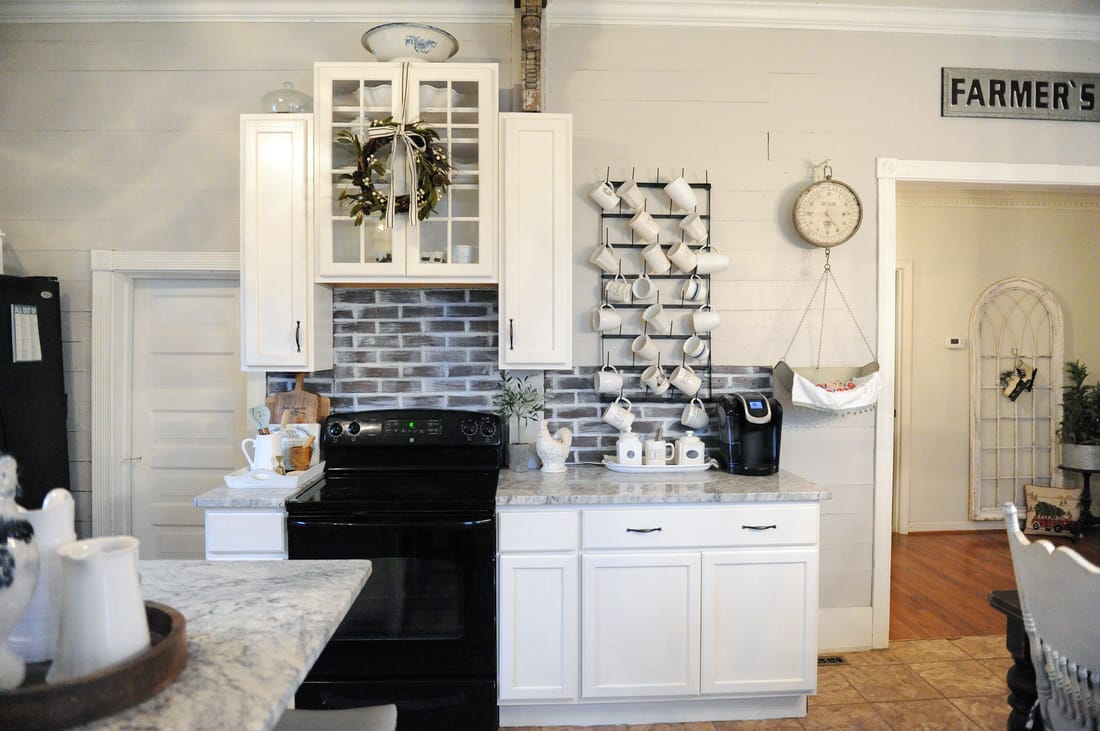  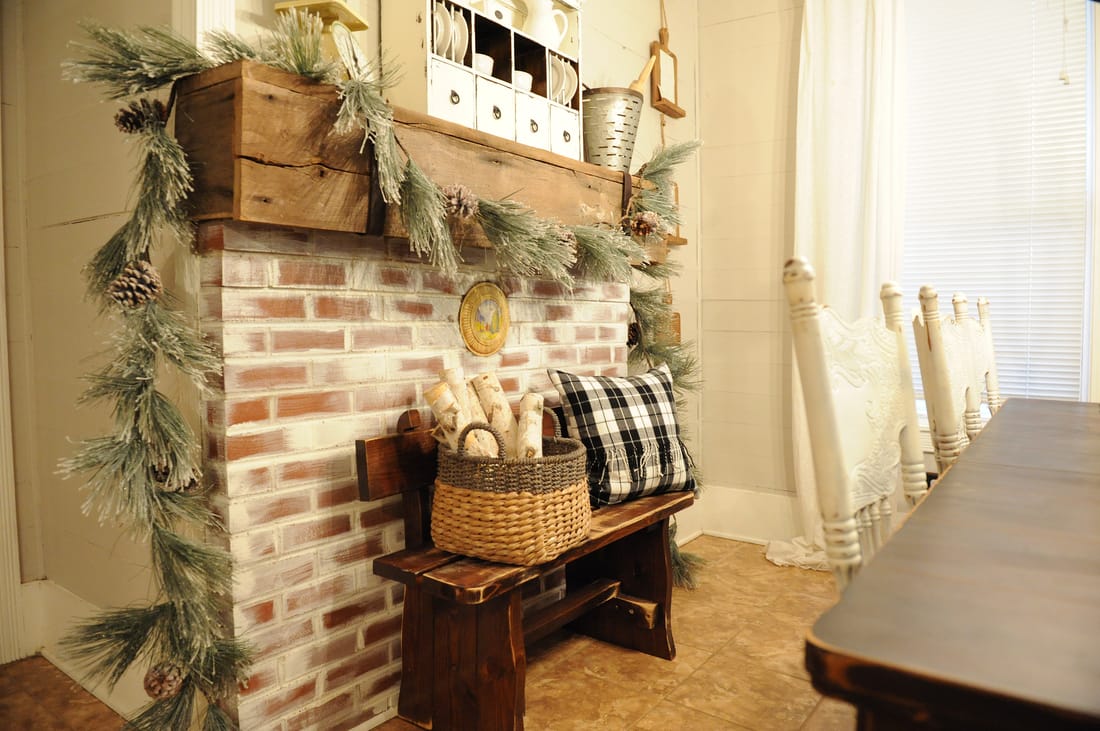
1 Comment
12/22/2016 08:33:39 am
I love our kitchen, your vision is way beyond anything I could imagine. Thank you for making this house "our home". I Love You! I look forward to transforming the rest of this house with you. Leave a Reply. |
AuthorI'm a wife, a mother of two, and utterly obsessed with home decorating and renovations (including, but not limited to: painting, decorating, interior design, and furniture renovation). Archives
September 2016
Categories |


 RSS Feed
